Expert guide to safely lifting coils without damage
How to bleach and tone your roots on coily hair

So you’re bleaching your roots? Different hair types often require different formulas and methods, so before you dive headfirst into the bleach bowl it's worth checking out all our different kits available so you can make sure you've got the safest bleach for you. Once you've decided on which kit is for you and have everything you need we've got all the tricks, tips and TLC we recommend for coily/4C hair below. Whether you're a total rookie or a seasoned DIY-er, it’s always worth refreshing your memory on how to get roots done just right, keeping your coils healthy and happy so you can colour with confidence! And if there's anything we haven't got covered here just drop us a line and one of our salon specialists will get back to you ASAP. We're all rooting for you!
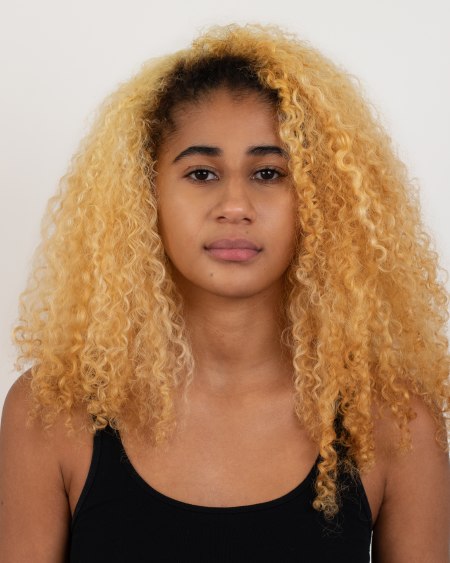
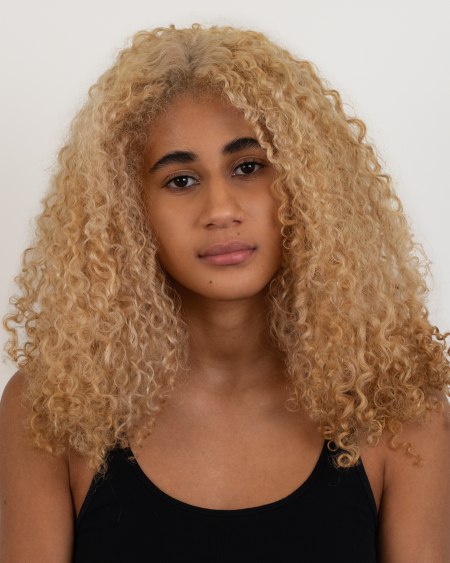
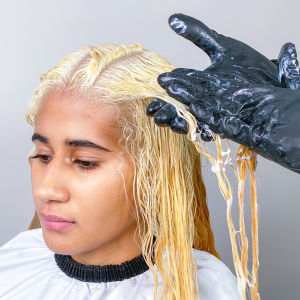
Before and after of bleached and toned roots on 4c hair. This model has a cooler tone but you can use our champagne toner and copper toner for warmer finishes.
Refresh your root regrowth every 6-8 weeks. If your curl pattern is very tight, refresh your root regrowth every 8-10 weeks. Your scalp generates heat, lightening the first 2-3 cm (1-1.25 inch) of your hair. If your roots grow longer than this before you bleach, you’ll get a brassy band.
It’s best to bleach your hair 3 to 5 days after your last wash to enable your scalp’s natural barrier to build up. This helps to protect the scalp during application, as it is more sensitive to bleaching when freshly washed.
With that said, ensure your hair is free of any oil, serum, edge control, gel, etc. Product build up may react and affect the bleaching process. What if my roots come out a different colour from my ends? Get in touch at info@bleachlondon.com with pictures of your hair so we can help figure out what the best solution is for you.
You must perform a strand test to check the condition of your hair and how it will look and feel after bleaching. Click here for our strand and skin sensitivity test guide.
Read all the instructions included in your Bleach Kit. Check the timings for your hair shape and texture.
Get prepped! Lay out your products and familiarise yourself with them. See our toolkit below.
Don’t wash your hair for 48 hours prior to bleaching as the natural hair oils help to protect the scalp.
Set aside 30 mins - 1.5 hours for the process.
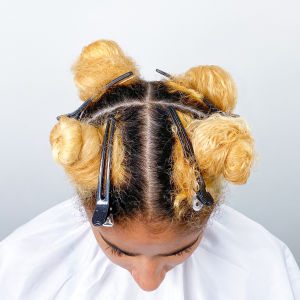
Use a comb to centre-part your hair. Then, part the left side from in front of your ear up to the centre-parting and secure it with a crocodile clip or hair tie. Repeat on the right hand side so your hair is divided into four neat, secure quarters. The top of your head should look like a hot cross bun.
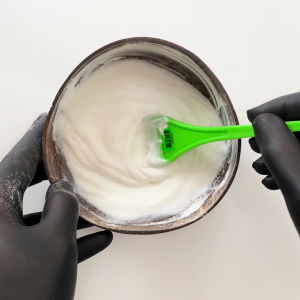
Cut open the bleach packet and pour its contents into a non-metallic bowl. Add the developing lotion and use a non-metallic spoon to mix them together into a smooth, creamy texture.
TOP TIP: Only mix when you’re ready to start. Mixed bleach can expand in the bowl, so do it just before you begin.
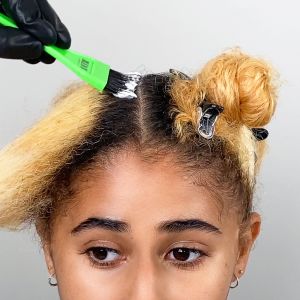
Begin at the front of your head. Use the end of the comb to slice out the first section of your hair at the crown. The slice should be a very thin sliver of hair, about 2cm wide.
Liberally paint the bleach onto your roots in the front right quarter using the tint brush.
Be careful not to touch the mids and ends where your hair has been bleached before.

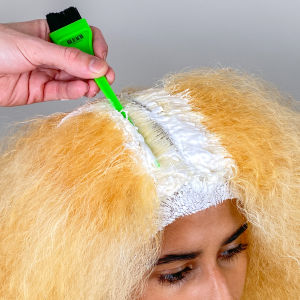
Slice hair out in small sections from the crown and apply bleach to your roots throughout the first quarter, followed by the second quarter.
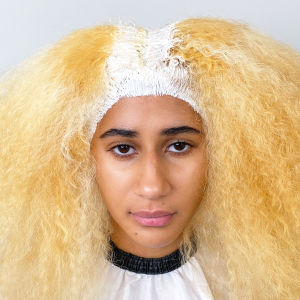
After your roots at the front are covered in bleach, paint the mixture on to the fine strands around your hairline. Once the front of your head is covered in bleach, set a timer for either 30 or 45 minutes, depending on your hair shape and texture.
Repeat slicing and applying through the back of your head at the roots. Once your roots at the back are covered in bleach, set a second timer.
How long you can leave the bleach on for depends on your hair shape and the thickness of individual hair strands.
If you have coily hair, or fine hair that's straight, wavy or curly, it will likely process more quickly, so don't leave the bleach on your roots for longer than 20-30 mins per quarter.We recommend checking the hair every ten minutes with a scrape test.
If you have thick hair strands that are straight, wavy or curly, your hair needs more processing time, so you can leave the bleach on your roots for up to 45 mins per quarter. Conduct a scrape test to check your hair after 20 mins and then again after 40 mins.
After your hair at the front has developed for the recommended amount of time, use the comb to gently scrape the bleach away from your roots to check the hair has lightened enough. Then rinse the front of your head until the water runs clear.
Repeat the scrape test at the back of your head after your second timer goes off. Then rinse until the water runs clear.
Top tip: If the hair feels gummy, overly stretchy or snaps then you should rinse immediately.

Shampoo and rinse your freshly bleached hair twice. We recommend smooshing Alex Plex through and leaving for 5-10 minutes to strengthen your locks. Rinse and you're ready to tone!
Break the colourant tube’s seal using its lid and unscrew the top of the developing lotion bottle. Screw the lid back on and shake well until the two products are completely mixed together.
TOP TIP:
Only mix when you’re ready to start. You should use your toner immediately, so mix just before you begin.

Loosely section your hair into four quarters. Use the toner bottle to apply the mixture to your mids and ends at the front, then the back of your head. Use the nozzle to slice through the quarters and apply more toner to the mids and ends through your whole head.
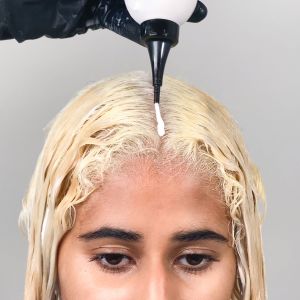
Use the toner bottle to apply toner to the roots all over your head. Use the nozzle to lift sections and apply more to the roots throughout.
Gently smoosh the toner in all over your hair, adding more product as you go to make sure every strand is well covered.
Once all your hair is covered with toner and smooshed in, let it develop for 20 minutes.

Rinse your hair with cool water until it runs clear, then condition and rinse again to finish the toning process.